How to deactivate Bing search in Windows 10
Built-in Search functionality in Windows 10 is very powerful, but did you know that everything you type in the Search is being transferred to the servers of the company from Redmond so that other than local, it will perform an online search using Bing service? We will show you an easy way to stop this behavior in our next video.
Video transcript:
- Type in regedit and press enter
- Open HKEY_CURRENT_USER
- Open Software
- Open Microsoft
- Open Windows
- Open CurrentVersion
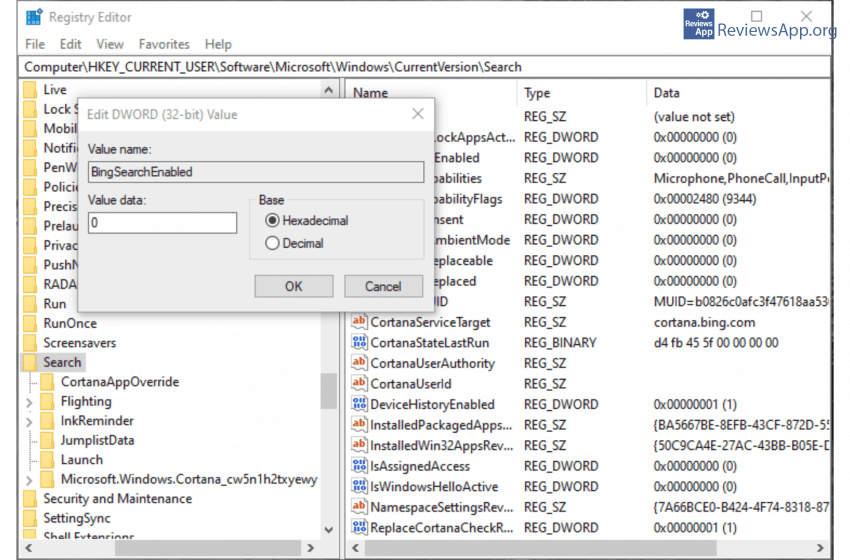
- Click on Search
- Click on Edit
- Go to New then click on DWORD (32-bit) Value
- Rename to BingSearchEnabled
- Double click and make sure that Value data is set to 0
- Double click on CortanaConsent and set Value data to 0
Rate:
 (No Ratings Yet)