Six things to do right after installing Windows 10
Installing Windows 10 is fairly simple, and once you’re done with the installation, setting up your operating system is the next important step. While there are no rules on how best to set up Windows 10, there are certain steps that are recommended to ensure that everything will work smoothly.
We’ll look at the first five things to do after installing Windows 10. This is best done right after fresh installation, but even later, if you haven’t done this, we recommend that you do so.
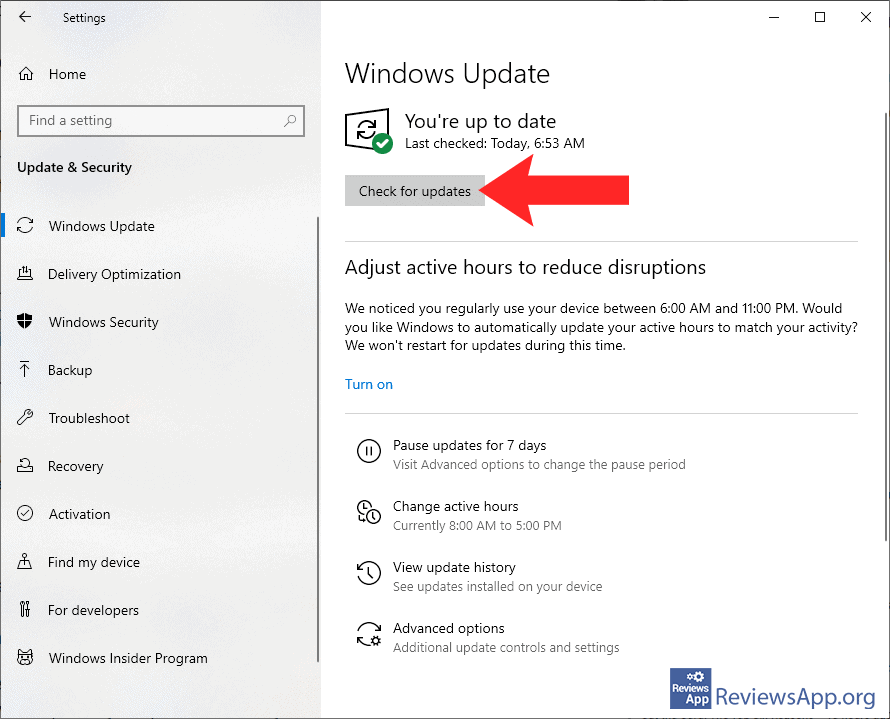
Update Windows 10
Although you have just installed a new copy of Windows 10, the version of that Windows is almost certainly not the last version, and chances are it is a few years old. When you use an older version of Windows 10 in addition to reduced security and frequent operating system instability, the programs you install may not work properly.
Windows 10 will automatically download and install all the necessary updates, but this can take several days as the updates will not all be downloaded at once. During this time, you will constantly receive notifications about installed updates and that you need to restart your computer. It is much easier to install all updates manually.
To update Windows 10, open Settings >> Update & Security and click Check for updates.
Delete preinstalled programs
When you install Windows 10 you get a bunch of preinstalled programs. Most of these programs are either completely unnecessary or require paying for a premium version to access all features. There are often much better and completely free replacements. In addition to preinstalled programs, there are a bunch of Microsoft services that users never use, but they are there, running in the background, collecting user data, and slowing down the computer.
We suggest you use the free program WinSlap, which allows you to quickly and easily delete all unnecessary programs and services from Windows 10. WinSlap is best used immediately after a new installation of Windows 10, although even if you use it later there will be no problems.
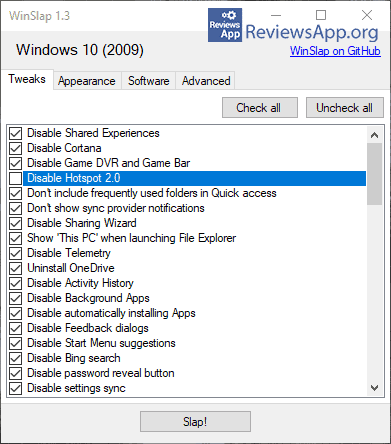
Using WinSlap is very simple. When you run the program all you have to do is select from the list what you want to remove and click the Slap button. Then your computer will restart and all selected options will be deleted.
One important warning we need to give is that all the options you choose will be permanently deleted and there is no easy way to get things back to the way they were before deleting. The options in the program are not very well explained, but it is easy to check what each of them is using Google. We sincerely believe that it will be safe for most users to delete everything the program offers to delete.
To download WinSlap please click HERE.
Install the latest drivers
A driver is a program that is in charge of managing hardware and it is always a good idea to have the latest version. Most laptops will automatically install drivers, but as with Windows, these will almost certainly be older versions of drivers.
The best way to always have the latest version of the driver is to use the free program Driver Booster. When you start Driver Booster, a scan of the hardware devices will be performed automatically. After a few seconds of scanning, a list of all the drivers that need to be updated will appear. By clicking the Update All button, the program will download and install the latest driver versions.
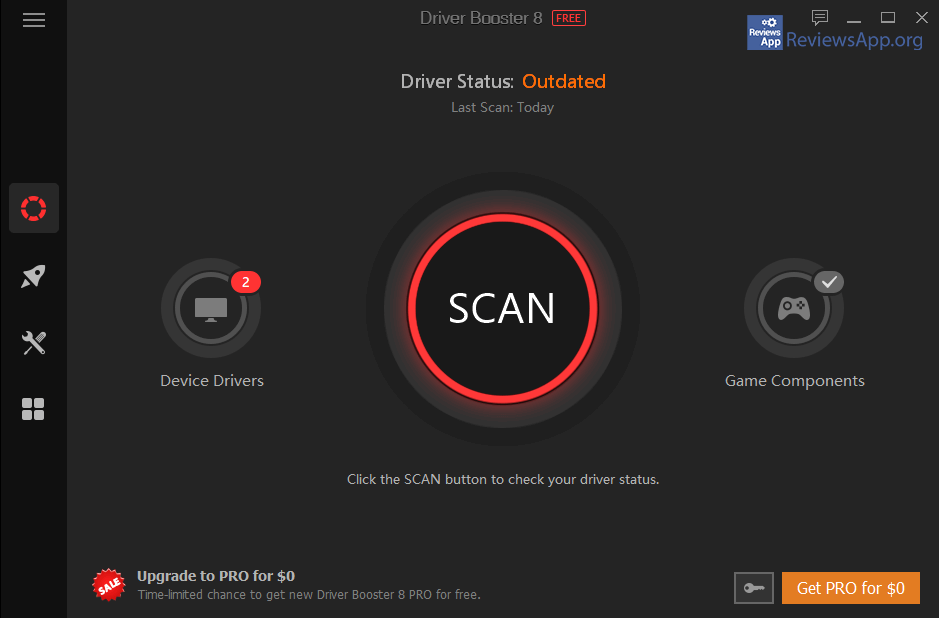
The best thing about using this program is that it will notify you when a new version of a driver appears and installing these drivers is very easy. Although you can do all this manually, we suggest using this program, especially if you are a beginner.
To download WinSlap please click HERE.
Turn on and update Windows Defender Antivirus
Windows 10 comes with a firewall and antivirus program called Windows Defender Antivirus. Since this is the first line of defense against malicious programs, it is recommended that this antivirus is always turned on and updated.
To turn on Windows Defender Antivirus, see our post: How to turn on Microsoft Defender Antivirus in Windows 10.
To update Windows Defender Antivirus, go to Settings >> Updates & Security >> Windows Security and click on Virus & threat protection. Here look for the Check for updates option under Virus & threat protection settings.

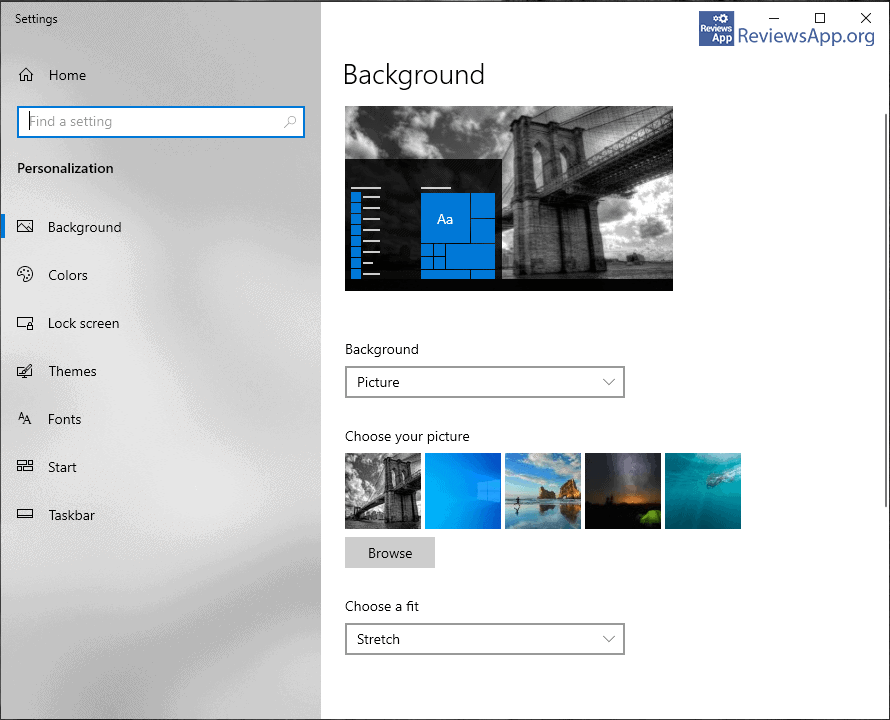
Customize the look of Windows 10
Right-click on the desktop and select the Personalize option. This will allow you to change what your work environment looks like. Here you can change colors, fonts, wallpaper, screensavers, and other user interface elements.
Another important setting is to adjust the monitor resolution. Right-click on the desktop and select Display settings to adjust the resolution and other monitor settings to suit your needs.
Create a System restore point
When you are done with all the settings we wrote about, before the last step, we suggest that you install all the programs you want to have on your computer. We will not go into which programs are best to install, because we believe that it is the personal choice of the user.
Once you do that, it is very important to make a System restore point. You do this because if a system crashes, this way, you can easily and quickly restore everything, without having to reinstall Windows, and all the settings you set will be saved.
See how to make a System restore point in our post: How to create a System restore point in Windows 10.
Rate:
 (No Ratings Yet)